


Gardens
Garden Paths and Hardscapes
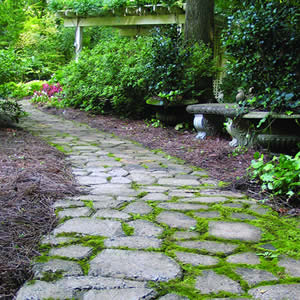
Good landscaping is about more than just plants. Paths, benches, walls, water features — they’re all part of hardscaping and can make or break the look of your yard and garden landscape. In the competitive housing market, every feature of a home is crucial in attracting potential buyers. The home’s exterior makes the first impression, […]
Create your own path
A well-made concrete walkway or garden path not only stands up to years of hard use, it enhances the natural landscape and complements a home’s exterior features. Traditional walkway materials such as brick and stone can be pricey and often difficult to install. As an easy and inexpensive alternative, you can build a new concrete path using manufactured molds, such as the Quikrete WalkMaker building forms. The result is a beautiful pathway that mirrors the texture and appearance of brick or natural stone with all the durability and economy of poured concrete. Project how-to Here is a simple, step-by-step process for making your own beautiful pathway. This is a weekend project one person can easily complete for a minimal cost. Typically, the cost to install a 10-foot-long concrete path is about $50 to $60 for materials. Materials- concrete mix or crack-resistant concrete mix
- liquid cement color
- polymer-modified jointing sand (optional)
- excavation and site preparation tools
- building form
- wheelbarrow or mixing box
- shovel
- level
- margin trowel or finishing trowel
- For every two 60- or 80-pound bags of dry concrete mix, blend one 10-ounce bottle of liquid cement color with five quarts clean water. Mix the liquid into the dry concrete until the color is uniform. Add more clean water as needed to achieve the desired consistency.
- After placing and finishing the path sections, cure the concrete carefully to produce the best color quality. If curing conditions are less than ideal, apply concrete cure and seal to ensure even curing and consistent color.
Easy ways to add extra appeal
- For a natural look, create a pathway out of decorative pebbles and walks. They take on a whole new beauty when they get wet, either from the rain or a nearby water feature.
- Create a rock garden with different types of gravel, pebble and stone arrangements. Add a few foliage plants and a small water feature for interest.
- Give an overlooked area definition with crisp white marble chips or all-purpose stone and flowers in brightly colored planters.
