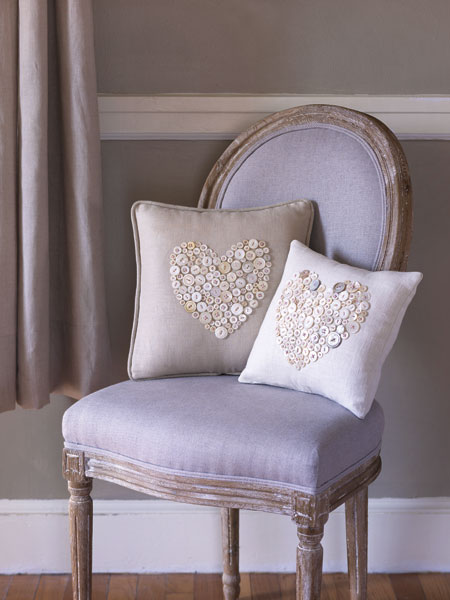
Here’s a lovely pillow you can whip up as a Valentine’s Day gift for your sweetheart or as a bit of seasonal décor. I designed it with a simple envelope closure, so that it requires only basic sewing skills and equipment (no zipper!).How to Make a Heart Button Pillow Photo Credit : Nat Rea
The bulk of the labor involves sewing the buttons, but once you get your fabric set up, it’s easy to just pick it up and sew a few at a time in a spare moment. If you have any antique buttons on hand, this is a great way to display them.
Note that the following instructions are for a 12-inch pillow; feel free to adjust the measurements to create whatever size you like. Also, if you feel comfortable with sewing and you’d like to add welting, it looks great here; I think it gives the pillow a nice, finished look. For pillow inserts, check your local craft store, but if it doesn’t carry them, you can easily find them at Etsy.com and other online shops.
This pillow project is a great way to display antique buttons. Photo Credit : Nat Rea
Heart Button Pillow Materials
1/2 yard linen fabric
fabric scissors
small sheet of paper, any kind
paper scissors
fine-point erasable fabric marker, such as Dritz Mark-B-Gone
embroidery hoop
embroidery floss (color of your choice)
embroidery needle, narrow enough to fit through your buttons’ thread holes
assorted buttons of your choice (I used approx. 150 vintage mother-of-pearl and shell buttons per pillow)
sponge
iron
straight pins
sewing machine & thread (color similar to fabric)
serger (optional)
12″x12″ down pillow insert
Heart Button Pillow Materials Instructions
1. Cut 3 pieces of linen: one 12″x12″ for the front and two 12″x8″ pieces for the back. (I’ve limited the seam allowance because the cover should be just a bit smaller than the insert, making for a nicely plump pillow.)
2. Cut the paper into a heart shape small enough to fit the pillow cover. (Use the old trick of folding the paper in half, then cutting out a half-heart profile and unfolding it.)
3. Trace the heart onto the 12″x12″ fabric piece with your marker.
4. Stretch the marked fabric onto an embroidery hoop.
5. Cut a 36″ length of embroidery floss, thread it through the needle, and double it over, knotting the ends. (Using a double strand will let you attach the buttons with a single stitch.)
6. Begin by stitching buttons around the outside of the heart; then fill the center, arranging the buttons as close as possible to one another without overlapping.
7. With a slightly damp sponge, wipe the marker ink off the fabric.
8. Now put a finished edge on the back panels. Fold 3/8″ along the longer side of one 12″x8″ piece and press with your iron. Fold again to tuck away the cut edge; then press and stitch for a finished edge. Leave the other long edge raw. Repeat with the other 12″x8″ piece.
9. Assemble the pillow cover: Lay the 12″x12″ front piece on the table, button side up; then lay the 12″x8″ back pieces face down, so that the raw edges align with the outside edge of the front piece and the finished edges overlap in the center to create the envelope opening. Pin all around to hold.
10. Stitch all the way around the outside edge of the pillow cover, 1/2″ in. Snip the points off the corners.
11. Use a zigzag stitch or a serger along the outside edge to finish the seam.
12. Turn the cover right side out and stuff the pillow insert inside.
Watch this video tutorial to learn how to sew welt cording onto a pillow.