Make Your Own Display Boxes
I wanted to add spring colors to our walls and I had several small cardboard boxes on hand — so I made these display boxes. Display boxes (also called “shadowboxes”) can be arranged on the wall for showcasing a collection of small treasures. The items in the boxes can be changed out as needed whenever […]
By Bonnie Thomas|Mar 24 2014|


I wanted to add spring colors to our walls and I had several small cardboard boxes on hand — so I made these display boxes. Display boxes (also called “shadowboxes”) can be arranged on the wall for showcasing a collection of small treasures. The items in the boxes can be changed out as needed whenever you want new scenery. I chose various dolls to feature in my display boxes (for now) because they happened to be sitting around my art space, but you can display any small collection of vintage toys, trinkets, seasonal or holiday themed items, or nature walk discoveries.

Credit: Bonnie Thomas
Materials to Make Display Boxes:
- Recycled cardboard boxes — i.e. boxes used for card games, greeting cards and jewelry. If you do not have recycled boxes on hand, you can purchase papier-mâché boxes from the craft store.
- Various patterned scrapbook papers sized 12″ x 12 “
- Glue
- Scissors
- String or ribbon
Directions to Make Display Boxes:
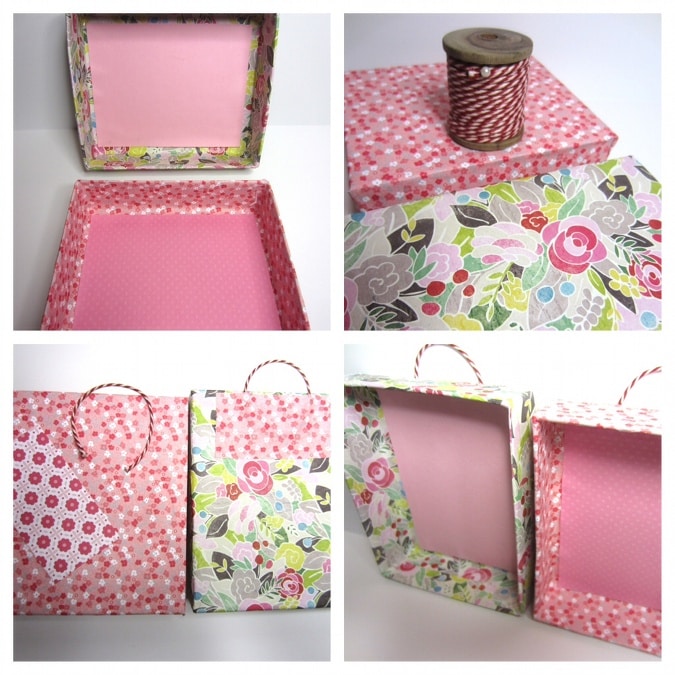
- Place your cardboard box on a piece of scrapbook paper.
- Crease the paper along the edges of the cardboard box (on all four sides). This will create an outline of your box.
- Put the box aside and then fold the creases on the paper more tightly.
- Cut the four outermost corner squares from your paper.
- Trim edges of paper as needed (this will depend on the size of your box).
- Apply glue to the cross shaped paper you have made.
- Place the box back in the center of the paper and then wrap the box in paper. Smooth out all the bubbles.

Credit: Bonnie Thomas
Credit: Bonnie Thomas

Credit: Bonnie Thomas

Credit: Bonnie Thomas