



How to Plant a Strawberry Pot
Most of us have a list of garden projects we’d like to tackle one of these days. Mine include putting in a small berry patch, some raised vegetable beds, a rose arch, a grape arbor, and wisteria vines. We live near the city, so some of these ambitions are clearly outsized. But I did cross […]
By Amy Traverso|May 24 2012|

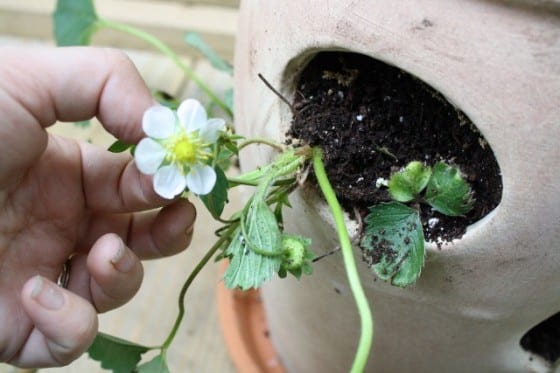
Most of us have a list of garden projects we’d like to tackle one of these days. Mine include putting in a small berry patch, some raised vegetable beds, a rose arch, a grape arbor, and wisteria vines. We live near the city, so some of these ambitions are clearly outsized. But I did cross one project off the list: figuring out how to plant a strawberry pot.

You’ve probably seen these pots for sale at garden centers. Standing about 12 inches tall, usually made of terra cotta, they have holes all along the sides from which a single strawberry plant can grow.
Planting in a pot accomplishes several goals: It allows you to produce a lot of fruit in a small space, it protects plants from weeds and the fruit from grit, spares you from having to prune a lot of runners, and allows you to move the plant for optimal sunlight and even ripening.
I purchased my pot at a garden center near Yankee’s offices in New Hamsphire. In retrospect, I should’ve held out for a slightly better design. The best pots have lips around the holes, which help hold in the soil. Mine doesn’t. I may try threading some straw in the holes to hold everything in, but you’ll have an easier time if you learn from my mistake and get a right pot a the outset.
Materials to Plant a Strawberry Pot
- A length of PVC pipe equal to the height of your pot
- Small rocks or gravel
- A drill
- Potting soil
- The pot
- 8 to 10 strawberry plants
The PVC pipe goes in the center of the pot and helps distribute water more evenly to all the plants. The gravel keeps the pipe from becoming clogged with dirt.
Directions to Plant a Strawberry Pot
Step 1: Prepare the pipe

Step 2: Put a rock in the hole at the bottom of the pot.

Step 3: Position the pipe in the center of the pot and surround it with potting soil.

Step 4: Thread the first two plants through the holes, working from the inside out. Don’t try to push the root ball in through the holes. It’s messy and can damage the roots.

Step 5: Once the first two plants are in, fill the pot with potting soil up to the height of the next holes.

Step 6: Repeat these steps until all the holes are filled.

Step 7: Fill the top with the remaining plants.

Now all I have to do is wait for these little berries to ripen, while remembering to water the container often as the weather gets warm. The containers dry out quickly, so be careful.
Our pot is located on the small deck off our kitchen, so I’m dreaming of the first morning I’ll get to step outside to grab fresh berries for breakfast. I can’t wait.






Where do you put the gravel?
Hi Marika-
You put the gravel in the pvc pipe in the center of the pot. I didn’t manage to get a good photograph of that step, but the gravel keeps that tube from getting filled with dirt.
What do you do with the strawberry pot in the winter? Will the plants survive outdoors or do you need to bring the pot inside?
Hi there-
To be safe, bring the potted plants inside to a sheltered location for the winter. A garage or basement would be fine. And water them every few weeks so the roots don’t dry out too much.
Oh, I can hardly wait to get the supplies and build a strawberry pot. You have made it sound and look so easy. Will keep you advised. Thank you!!