


How To
Mod Podge Pumpkins
Halloween is just around the corner, so it is only fitting that this week, we focus on pumpkins. I absolutely love the many shapes, colors and sizes of pumpkins and gourds that I usually come across at our local farmers market, but this year, I wanted to take them to a whole new color level.With […]
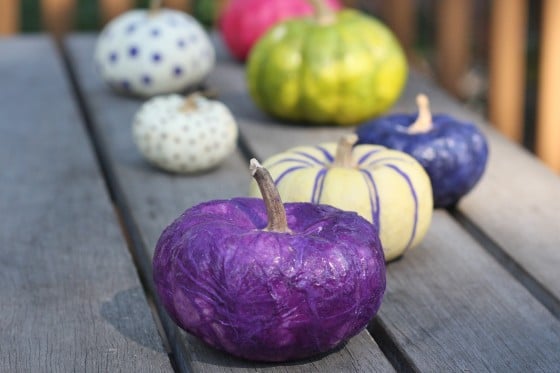
Halloween is just around the corner, so it is only fitting that this week, we focus on pumpkins. I absolutely love the many shapes, colors and sizes of pumpkins and gourds that I usually come across at our local farmers market, but this year, I wanted to take them to a whole new color level.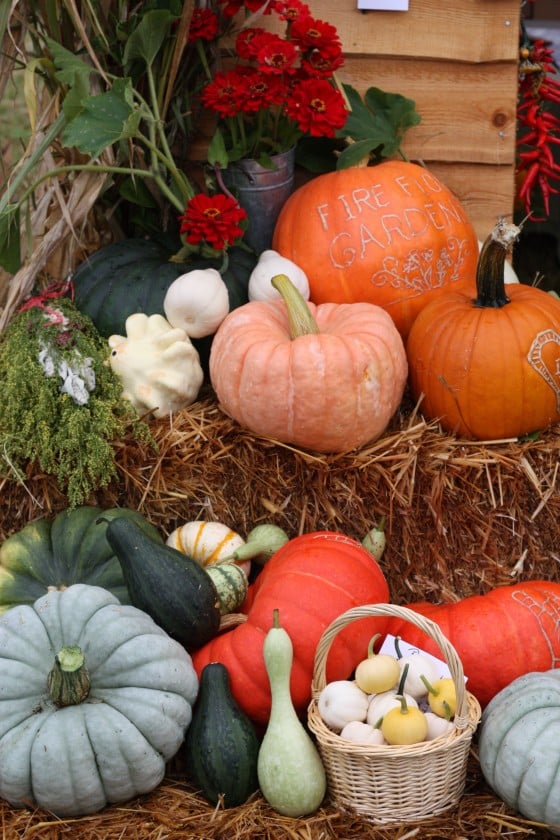 With a bit of Mod Podge and some beautiful handmade paper, I managed to craft myself a beautiful variety of jewel toned pumpkins, perfect for decorating my fall tabletop.
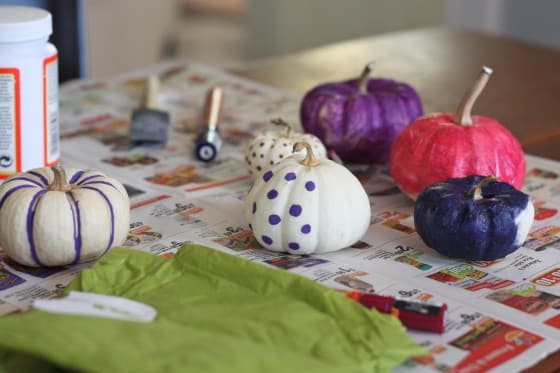 Materials: Mod Podge, brush, miniature white pumpkins, colorful tissue paper.
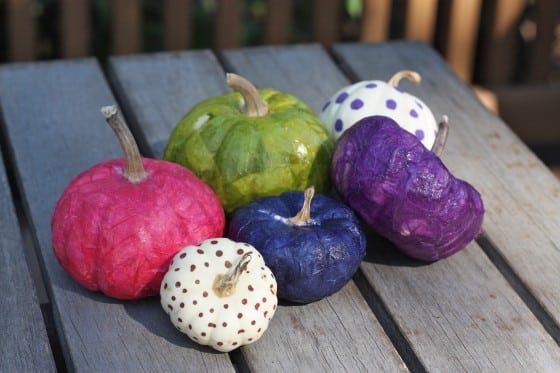 Directions: Using a paintbrush, apply a thin coat of Mod Podge over a section of the pumpkin. Immediately cover it with a small piece of tissue paper. Continue in small sections until the entire pumpkin is covered. For very thin, translucent paper, you might need to do more than one coat of paper- in that case, wait until the first coat is dry before applying the second.*Note- For the polka-dot and striped pumpkins, I just used an acrylic paint pen! Super simple!
With a bit of Mod Podge and some beautiful handmade paper, I managed to craft myself a beautiful variety of jewel toned pumpkins, perfect for decorating my fall tabletop.Materials: Mod Podge, brush, miniature white pumpkins, colorful tissue paper.Directions: Using a paintbrush, apply a thin coat of Mod Podge over a section of the pumpkin. Immediately cover it with a small piece of tissue paper. Continue in small sections until the entire pumpkin is covered. For very thin, translucent paper, you might need to do more than one coat of paper- in that case, wait until the first coat is dry before applying the second.*Note- For the polka-dot and striped pumpkins, I just used an acrylic paint pen! Super simple!