Food
New England Patriots Super Bowl Treats
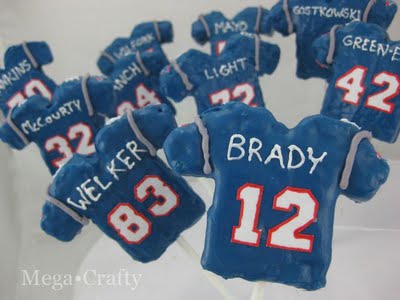
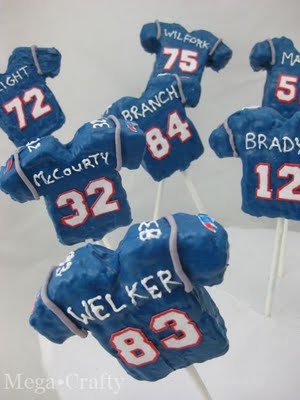
When we stumbled upon a blog post for New England Patriots Pops over at Mega•Crafty, we knew we’d found a Super Bowl treat our readers would love. A Pat’s fan after our own hearts, Meg came up with this oh-so-sweet — not to mention adorable — way to support the home team, and she kindly […]
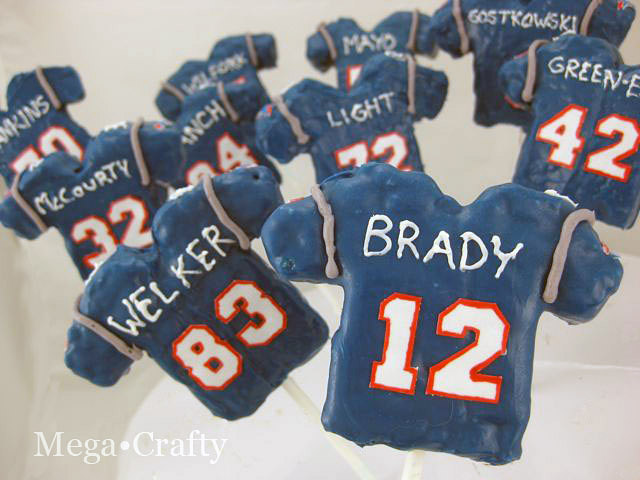
Photo Credit : Moynahan, Meg
When we stumbled upon a blog post for New England Patriots Pops over at Mega•Crafty, we knew we’d found a Super Bowl treat our readers would love. A Pat’s fan after our own hearts, Meg came up with this oh-so-sweet — not to mention adorable — way to support the home team, and she kindly shared her instructions on how to make them with us. Thanks, Meg!
 They were the perfect shape and size. And buying them rather than making a batch myself allowed me to get right to the decorating. (But you could make a batch and cut them into rectangles. Or better yet, use a shirt cookie cutter if you have one!)
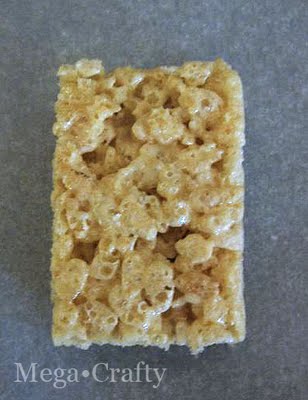 After unwrapping all my cereal bars, I cut one bar into the pieces that I used to make the sleeves. One bar makes enough sleeves for four jerseys.
 For the main body of each shirt, I used a whole treat and cut a “V” shape out of the top for the neck. Then I attached the arms to each side. It’s amazing how these cereal treats will stick together and be molded like clay. I used the parts that I cut out of the neck to fill gaps and areas that didn’t stick.
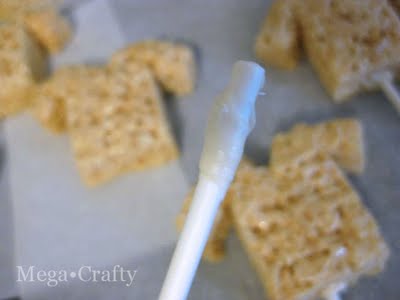
 Then I stuck in the lollipop sticks. Dipping them into a little melted white chocolate candy melts helps them hold better.
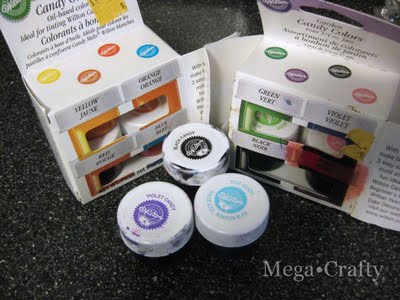
 After all the sticks were in the little shirts, I stuck them into the freezer for a few minutes to harden them up a bit. While they were chilling, I got ready to melt and dye a bag of blue chocolate candy melts. I carefully melted the chips and added enough dye to get a dark blue that was more like the Patriots color than the original baby blue color of the candy melts. It took a LOT of blue dye, a pretty good amount of black and a tiny bit of violet to get this color. Really be careful with the violet — you don’t want to end up with Vikings purple instead of Patriots blue!
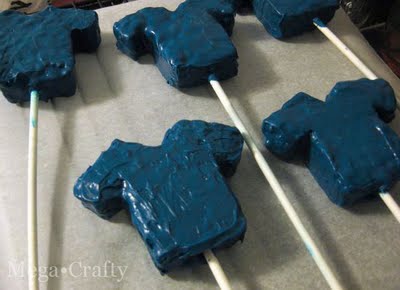
 I dipped my pops into the dark blue and set them upright in a stand to dry. One thing to note here: the chocolate came out very thick and sort of gloppy. I’m not sure if that’s because I was dipping cereal treats, or if that just happened to be the texture of the candy melts. It would have been easier if the chocolate was a bit thinner, but I smoothed it with a knife and most of them turned out fine. Luckily the imperfections also worked for these, it made the shirts look more like fabric with wrinkles and movement instead of a plastic-like brick.
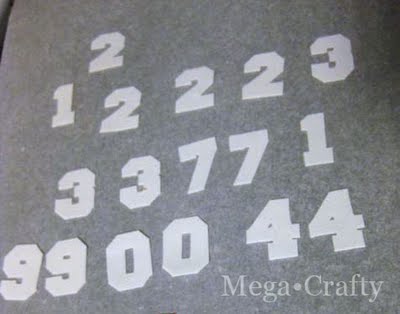
 Once all my pops were dipped, I began to cut out numbers. I started with a printed template. Then used the paper numbers as my guide while I cut the numbers for the pops out of a white sugar sheet.
 After the numbers were done, I thought I’d try to cut out the little logo for each sleeve. I was surprised at how easy it was, and before I knew it, I had more than enough for all my pops! I “glued” my numbers and logos to the shirts with little dabs of frosting.
 I then used food coloring pens to color the top part of the logo and the outlines for the numbers.
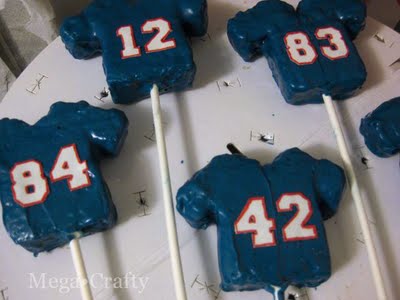 All that was left was to pipe the finishing details. This was the scariest part for me because I’m not very good at piping, and I was going to have to use the smallest tip I’ve ever held to fit all the letters on those tiny jerseys. Honestly, I was pretty sure this would be the point where I’d wreck them and I was dreading it because they were almost done. After the names were finished I decided to add the number onto the top of each sleeve just like on a real jersey.
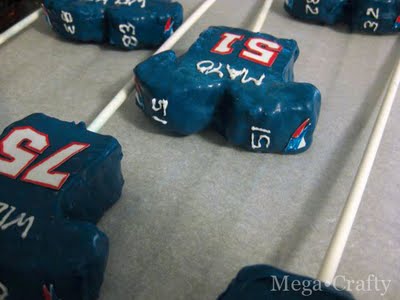 Then I added a gray line to each sleeve. Piping the gray was super easy after all those tiny nerve wracking details of numbers and names!
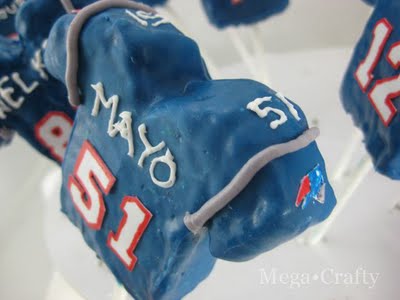 Finally —because I was totally captivated by the tiny sugar decorating minutia of it all — I used a toothpick to add gray into the face of the logo on each sleeve.
 SOURCE: Mega•Crafty

Instructions to Make Patriots Pops
To make these pops, I used pre-packaged cereal treats. They were the perfect shape and size. And buying them rather than making a batch myself allowed me to get right to the decorating. (But you could make a batch and cut them into rectangles. Or better yet, use a shirt cookie cutter if you have one!)
 After unwrapping all my cereal bars, I cut one bar into the pieces that I used to make the sleeves. One bar makes enough sleeves for four jerseys.
 For the main body of each shirt, I used a whole treat and cut a “V” shape out of the top for the neck. Then I attached the arms to each side. It’s amazing how these cereal treats will stick together and be molded like clay. I used the parts that I cut out of the neck to fill gaps and areas that didn’t stick.
 Then I stuck in the lollipop sticks. Dipping them into a little melted white chocolate candy melts helps them hold better.
 After all the sticks were in the little shirts, I stuck them into the freezer for a few minutes to harden them up a bit. While they were chilling, I got ready to melt and dye a bag of blue chocolate candy melts. I carefully melted the chips and added enough dye to get a dark blue that was more like the Patriots color than the original baby blue color of the candy melts. It took a LOT of blue dye, a pretty good amount of black and a tiny bit of violet to get this color. Really be careful with the violet — you don’t want to end up with Vikings purple instead of Patriots blue!
 I dipped my pops into the dark blue and set them upright in a stand to dry. One thing to note here: the chocolate came out very thick and sort of gloppy. I’m not sure if that’s because I was dipping cereal treats, or if that just happened to be the texture of the candy melts. It would have been easier if the chocolate was a bit thinner, but I smoothed it with a knife and most of them turned out fine. Luckily the imperfections also worked for these, it made the shirts look more like fabric with wrinkles and movement instead of a plastic-like brick.
 Once all my pops were dipped, I began to cut out numbers. I started with a printed template. Then used the paper numbers as my guide while I cut the numbers for the pops out of a white sugar sheet.
 After the numbers were done, I thought I’d try to cut out the little logo for each sleeve. I was surprised at how easy it was, and before I knew it, I had more than enough for all my pops! I “glued” my numbers and logos to the shirts with little dabs of frosting.
 I then used food coloring pens to color the top part of the logo and the outlines for the numbers.
 All that was left was to pipe the finishing details. This was the scariest part for me because I’m not very good at piping, and I was going to have to use the smallest tip I’ve ever held to fit all the letters on those tiny jerseys. Honestly, I was pretty sure this would be the point where I’d wreck them and I was dreading it because they were almost done. After the names were finished I decided to add the number onto the top of each sleeve just like on a real jersey.
 Then I added a gray line to each sleeve. Piping the gray was super easy after all those tiny nerve wracking details of numbers and names!
 Finally —because I was totally captivated by the tiny sugar decorating minutia of it all — I used a toothpick to add gray into the face of the logo on each sleeve.
 SOURCE: Mega•Crafty

