Embrace New England’s winters and make a snow shelter in your own yard with these instructions on how to build an igloo in 10 steps.
By B. J. Roche|Dec 28 2021|
Coffee By Design | Portland, Maine
Photo Credit : Katherine Keenan
How to Build an Igloo in 10 Steps
How to Build an Igloo in 10 Steps Photo Credit : Gil Martinez
1. Pace out a 10×10-foot swath, pile up the snow inside it, and keep tamping it down with a snowshoe or a shovel. Continue shoveling and compacting snow until you have a large mound, about 1.5 feet high. Let it sit for several hours or even overnight.
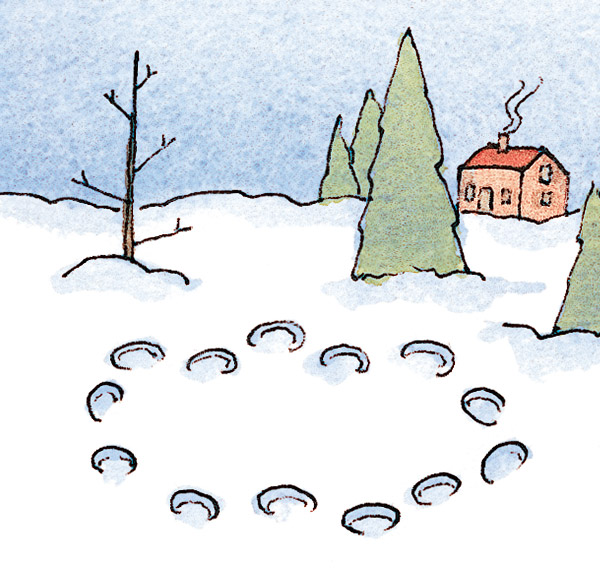
2. To mark out an area for your igloo, lie down and make a snow angel (the inside diameter of the igloo).
3. From your snow mound, cut blocks of uniform size, about 1.5 to 2 feet high, 1 foot thick, and 2 feet long, with a carpenter’s saw. (Don’t let your kids use one unsupervised.) The bigger the blocks, the fewer the seams and the more structurally sound the igloo will be.
How to Build an Igloo in 10 Steps Photo Credit : Gil Martinez
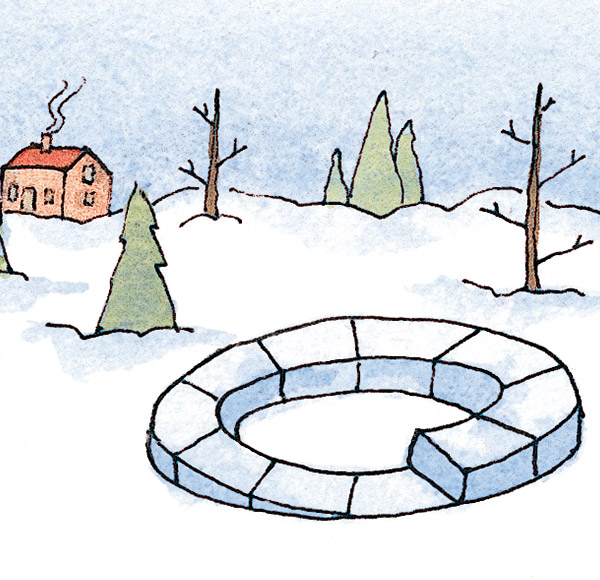
4. Lay the foundation: Set blocks in a ring around the outside of your snow angel. Each block should touch the one beside it. Now using your saw, begin making a spiral ramp from the foundation blocks: “Choose a point, saw down through each block, and put an angled surface on it,” instructs Bert Yankielun. You’re cutting away the tops of the blocks to form a circular wedge. At some point you’ll have almost none of the first block you put on the ground.
[text_ad]
5. Continue stacking layers of blocks and trimming them. “As you go around, you have a full-size block next to one that’s cut off,” Bert explains. “Then, when you put the next one on, you have two points of contact, a block to lean on, and something on the bottom.” As you stack the blocks, stagger the seams so that the seam from each block in the bottom row is in the middle of the block on top of it.
6. As you continue, “you may need to cut a bevel inward, stacking around, and trimming the inside edge of the block so the next one will be leaning in further,” Bert advises. “As you’re going around and around, that spiral, the dome, is closing in.”
How to Build an Igloo in 10 Steps Photo Credit : Gil Martinez
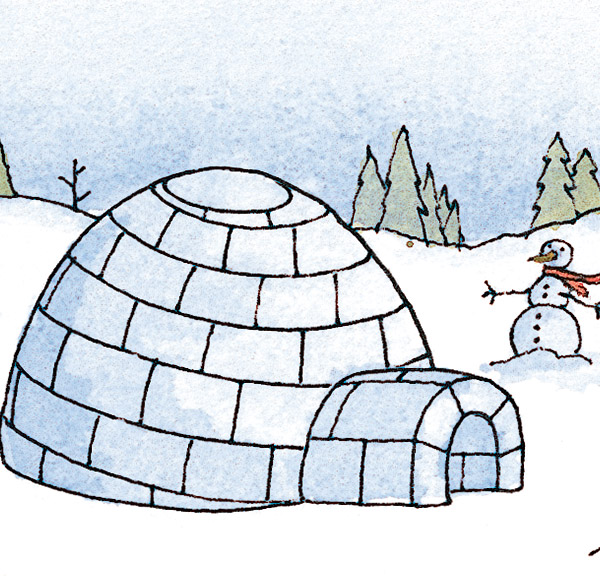
7. When you finish stacking, you’ll have a small hole in the top. Cut a block of snow and put it into the top like a cork.
8. To create a door, find a place on the first level of the igloo that has a vertical seam where two full-size blocks meet. There should be a full-size block over the seam–you’ll use that as the door head. Cut away half a block on either side of the seam on the first level. Then cut an arch shape into the bottom half of the overhead block, leaving the top half intact. Your door should be big enough to crawl through but small enough that you don’t let the cold air in.
How to Build an Igloo in 10 Steps Photo Credit : Gil Martinez
9. Use the saw to make a fist-sized air hole high on the side of the igloo. In snowy conditions, leave a ski pole in the hole to use like a bottle brush to keep it clear.
10. Some cautions for parents: Always supervise children when they’re playing in and around the igloo. Once the igloo is up, check it regularly for structural integrity. Never allow stoves or candles inside. Keep the air hole clear.
Check out this article for more information on how to build an igloo.
Share your stories and expertise on how to build an igloo in the comments!
This post was first published in 2008 and has been updated.


Great idea and easy to follow instructions. Thanks for another wonderful New England tradition from Yankee!
Has Bert built this ?