How To
Holiday Crafts | Make an Envelope Advent Calendar
When you make your own advent calendars it can be challenging to remember to have them made before the first of December. Therefore, this project comes in time for you to have a couple weeks to gather your materials together and make your own. This particular calendar is made using “small coin” or […]

Coffee By Design | Portland, Maine
Photo Credit : Katherine Keenan
Photo Credit : Bonnie Thomas
Materials to Make an Envelope Advent Calendar
- 25 small envelopes. I used “small coin” envelopes from an office supply store, but you can use any style of small envelope.
- Ballpoint glue pen (found at craft shops)
- Fine or ultra fine silver glitter
- 25 Christmas images (I used royalty-free images from a book similar to this one http://store.doverpublications.com/048699967x.htm but you can also cut images from magazines or use holiday stickers)
- White glue
- Green paper, or other matching color for your images
- A hole punch
- Scissors
- Ribbon, wired ribbon, or thin garland

Photo Credit : Bonnie Thomas
Directions to Make an Envelope Advent Calendar
- Turn the envelopes over so that the flap is facing you. This is the side of the envelope you will be decorating.
- Glue an image to each of your 25 envelopes using the white glue.
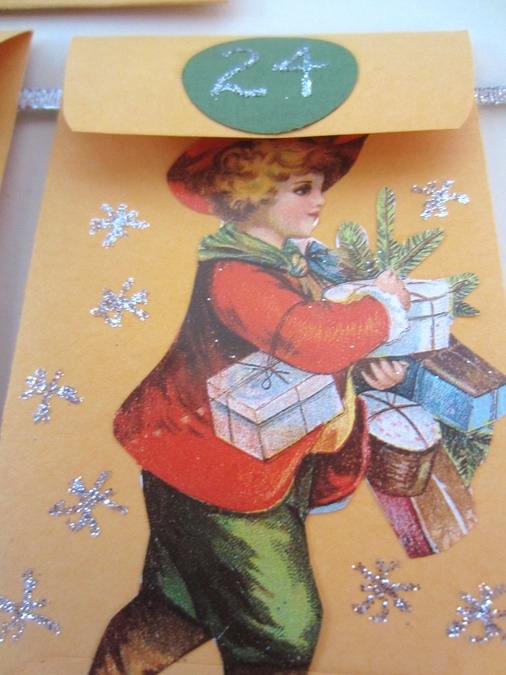
- Decorate one envelope at a time: Use your ballpoint glue pen to outline the envelopes; to add decoration or bordering to the edges; or to write words around the images. You can also draw snowflakes with the glue pens. (See my photos if you need an example or inspiration). The glue dries quickly which is why you want to work on one envelope at a time.

Snowflakes created using ballpoint glue pen and fine glitter
Photo Credit : Bonnie Thomas - Sprinkle fine silver glitter over the glue. Tap the envelope to remove excess glitter. It is best to do this step over a garbage pail.
- Allow the glue and glitter to dry.
- Cut 25 small circles from your green paper. The circles need to be small enough to fit on the flap of the envelope.
- Use your ballpoint glue pen to write numbers 1-25 on the circles and sprinkle the numbers with fine glitter as you did above.
- Glue the numbered circles to the flaps of your envelopes.
- Allow the envelopes to dry completely.
- Punch a hole on each side of your envelopes, just under the flap. It is best to punch a hole to the far left and then the far right so that you have as much room as possible to tuck something in the envelopes.
- Thread your ribbon through the holes of the envelopes.
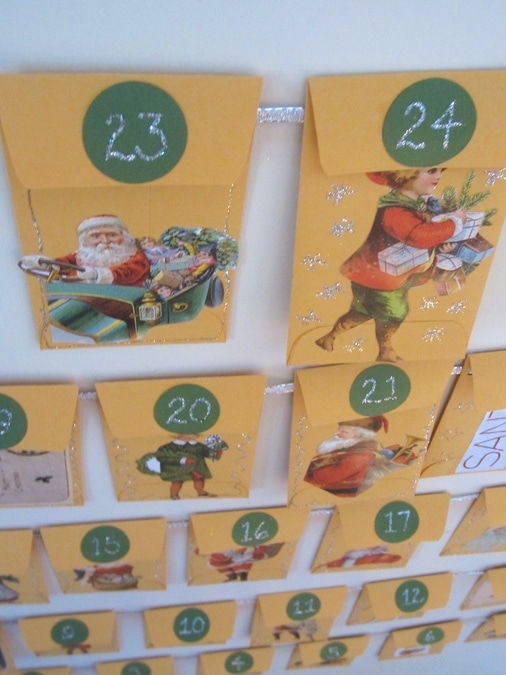
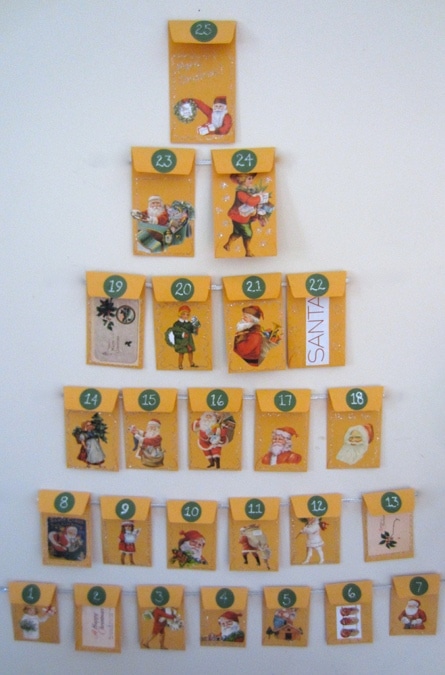
- IF you want to hang your calendars in the shape of a tree, then attach 7 of the envelopes to one ribbon, then 6 on another ribbon, then 5, then 4, then 2. You will have one envelope leftover for the top of the tree. See photo for reference.

Envelope Advent Calendar in shape of Christmas tree
Photo Credit : Bonnie Thomas - You can also hang all the envelopes on one garland or ribbon for decorating a stair banister, wall, or mantel.
- Hang your advent calendar.
- Tuck a small item in each of the envelopes. Some people like to put small gifts or candy in the envelopes but the envelopes are small, so plan accordingly. You can also fill envelopes with notes of appreciation, coupons for special treats or favors, or tickets to a special event.
- The person who receives or shares the advent calendar will open one envelope per day until Christmas. Envelope 1 gets opened on December 1, envelope 2 gets opened on December 2nd and so on.


