How To
Make a Woodland Dessert Stand
Dessert stands are a whimsical way to present desserts or appetizers for a special event. Birthdays, weddings, tea parties, or garden parties and other summer gatherings are perfect occasions for a festive table for foods and desserts. A Woodland Dessert Stand goes well with any of the forest themes that have become popular over the years – owls, hedgehogs, […]
By Bonnie Thomas|Jun 15 2015|![]()
Coffee By Design | Portland, Maine
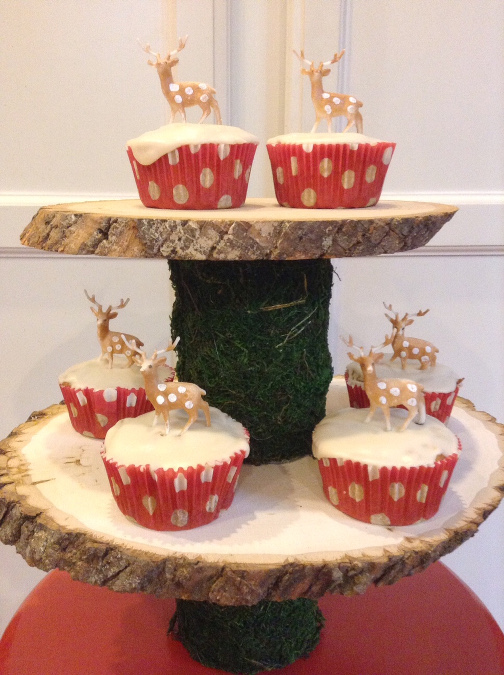
Photo Credit : Katherine Keenan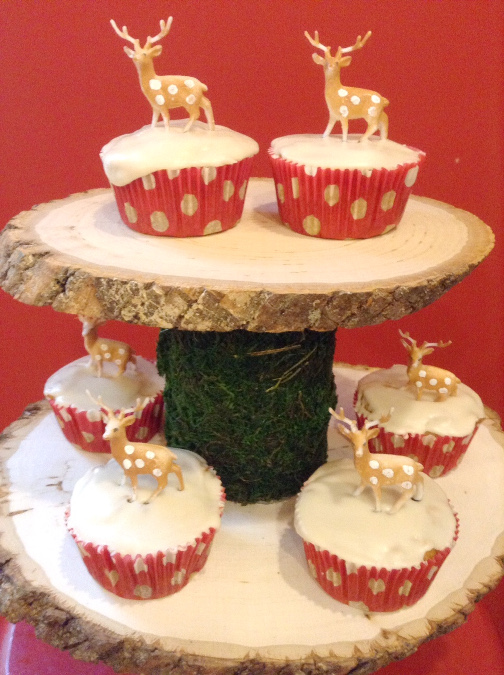
Photo Credit : Bonnie Thomas
Materials needed to make a Woodland Dessert Stand:
- 2 recycled tin cans – washed and dried
- 2 tree slices of different sizes – these can be purchased at Michaels or other craft stores if you prefer not to cut your own
- A package of moss sheets, also found at the craft store
- Scissors
- A hot glue gun and accompanying glue sticks
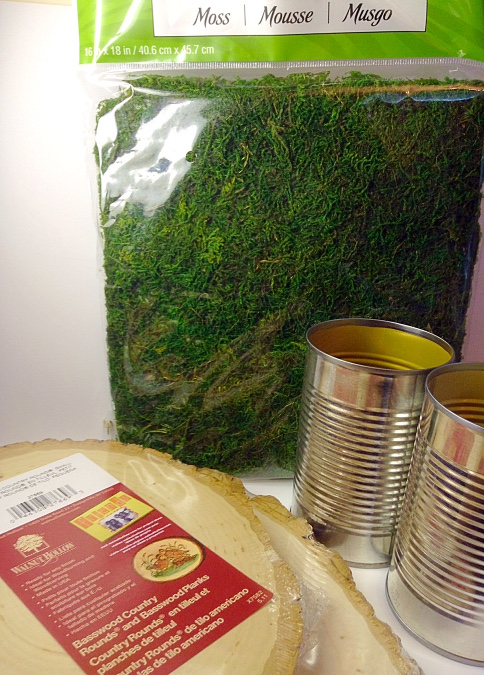
Photo Credit : Bonnie Thomas
Directions to make a Woodland Dessert Stand:
- Remove the moss sheet from the package and smooth it out.
- Lay one of your can on the sheet to see how wide you will need to cut it. Cut the sheet along that width.
- Wrap the trimmed sheet around the can until the ends slightly overlap – trim the excess sheet.
- Use hot glue to apply the moss sheet to the can.
- Repeat the above steps with the other can.
- Wash the surface of the tree slices with a little bit of warm water and soap. Allow this to dry.
- Use hot glue to attach the moss covered cans to your tree slices so that the larger slice is on the bottom and the smaller slice is at the top.
- Some moss sheets can have an odor to them – it helps to put them outside or in direct sunlight to air them out before putting food on the stand.
Photo Credit : Bonnie Thomas