How To
Paper Pumpkins Craft | Decorate for Fall
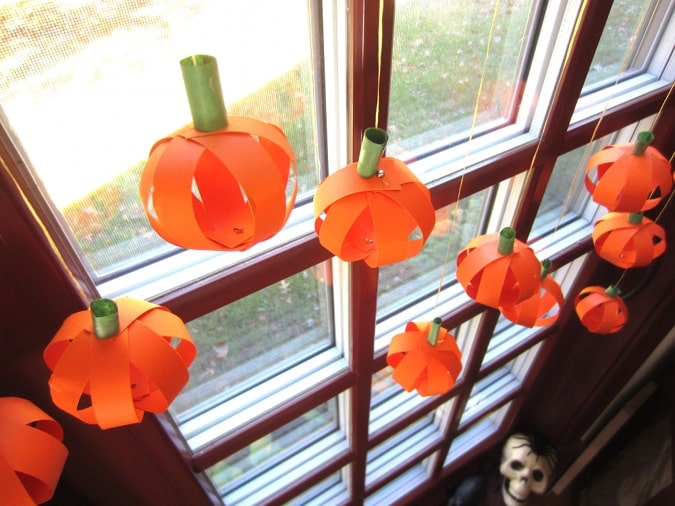
It’s pumpkin season! These easy-to-make paper pumpkins can be hung as decoration for Halloween as well as Thanksgiving. The paper pumpkins are made from strips of orange paper that are attached with small metal brads. You can tie string around the brads to hang the pumpkins wherever you like such as stair banisters, window frames, […]
By Bonnie Thomas|Oct 21 2013|![]()
Coffee By Design | Portland, Maine
Photo Credit : Katherine KeenanPhoto Credit : Bonnie Thomas
Materials Needed for Paper Pumpkins
- Plain orange scrapbook paper sized 8 1/2′ x 11″ . Each sheet of orange paper will make 6 pumpkins.
- 1 sheet of green paper
- Tape
- String
- Small metal brads
- A tack
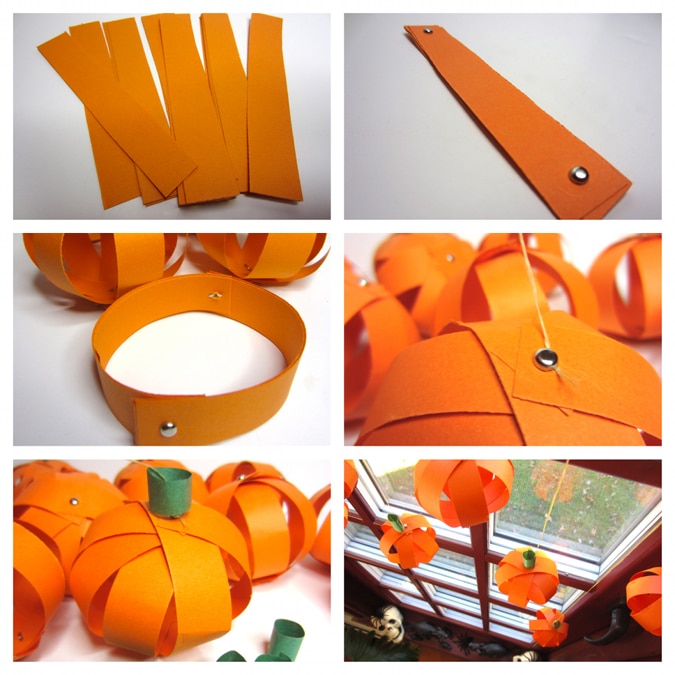
Photo Credit : Bonnie Thomas
Instructions to Make Paper Pumpkins
- Trim the orange paper into 1/2 ” x 4″ size strips.
- Gather 7 of the strips into your hand and layer them , one on top of the other.
- Push a tack through the bottom of the strips.
- Insert a brad into the tack hole and push it through all the layers. Fold back the metal tabs of the brad on the other side.
- Now push a tack through the top of the strips. Insert another metal brad through this hole and fold back the tabs of the brad to secure it in place.
- You will now have a stack of 7 paper strips with a brad securing them at the top and at the bottom.
- Pull three to four of the paper strips around so that you create an “0” shape, like a bracelet.
- Then slide the paper strips out and around, into an orb shape. It’s common for the paper strips to be tight, but be patient and persistent if this happens.
- Once you have adjusted the strips to create an orb, tie a piece of thin string to the top of the brad. It helps to push the brad up a little to create a space for the string to go around the underside of the brad.
- Tie a knot to secure the string to the brad.
- Roll a small piece of green paper into a tube shape and tape it into place.
- Slip the green tube over the string and this will fall onto the pumpkin to create a stem.
- Now hang the pumpkin where you like!
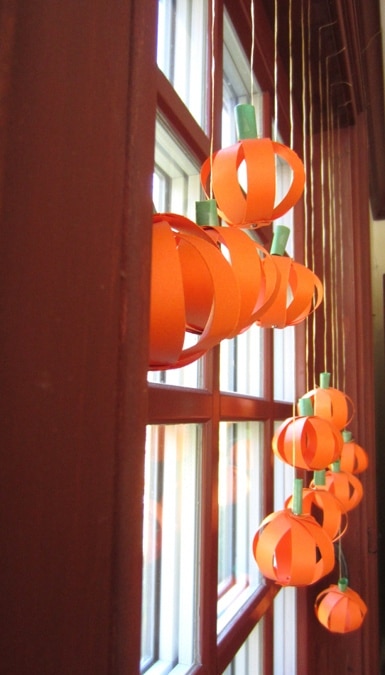
Photo Credit : Bonnie Thomas