How To
Halloween Crafts | Make a Pumpkin Coach
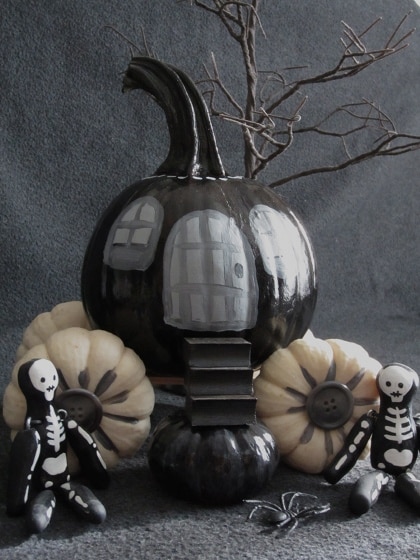
Ever since I laid eyes on an actual pumpkin coach (a miniature version of course) I have wanted to create one for myself. There are numerous possibilities for creating coaches and vehicles with pumpkins and gourds that I may have to make this a yearly tradition so I can experiment with different themes and characters. I will tell […]
Coffee By Design | Portland, Maine
Photo Credit : Katherine Keenan
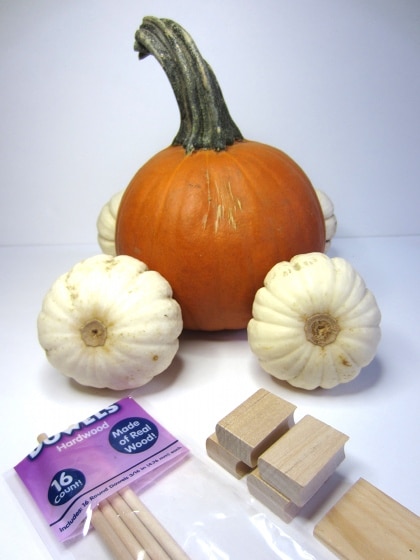
Materials needed to create a pumpkin coach:
- One small round orange pumpkin (for the coach)
- 4 small “Baby Boo” white pumpkins (for the wheels)
- 1-2 dowels — I used a 3/16″ size (for the wheel axles). You could probably even use pencils in place of dowels if you didn’t want to go searching for dowels at the craft store.
- 1 drill (to drill holes for the axles in the white pumpkins)
- One small piece of scrap wood or wooden ruler
- 1 mini hand saw. This may be optional– you might need to cut the dowel and/or the piece or scrap wood or ruler. I broke the dowel in half with my hands because I am too impatient to saw something. The scrap wood I used was precut, therefore I didn’t use a saw at all for this project, but you may need to.
- Black and white acrylic paint
- Paintbrush
- 4 grey or black buttons
- Scotch tape
Directions to make the Pumpkin Coach:
- Wash and dry all your pumpkins.
- Remove the stems from the white pumpkins–I used a butter knife to pop mine off.
- Drill holes through the white pumpkins (all the way through), making sure you use a drill bit based on your dowel size.
- Before you put the frame of your coach together, you will need to experiment and see how your pumpkins fit together. Pumpkin sizes vary greatly, so take the time to play with your frame pieces a bit and see where things need to be cut. I had a 12″ dowel and it worked well to just cut the dowel in the middle–my coach is about 6″wide. The center frame piece (the scrap wood/ruler) is 7″ long. The most important detail here is to make sure that once your wheels are attached and the frame is together, that your pumpkin has room to sit on the frame.
- Once you know how long your pieces need to be, cut your dowels and/or frame pieces accordingly.
- Insert one dowel into a white pumpkin. Push it all the way through, but make sure it is not sticking out of the other side of wheel. Also, make sure the top of the pumpkin is facing outward.
- Insert a white pumpkin onto the other end of the dowel. Repeat this with the other dowel and 2 white pumpkins. Again, make sure the tops of the pumpkins are facing outward.
- Glue your piece of scrap wood/ruler to the axles like so:
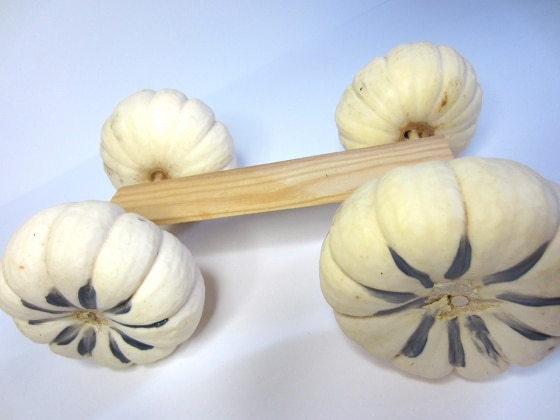
The pumpkin coach frame - Next, paint your pumpkin black and allow the paint to dry. Mine needed 2 coats of black acrylic paint.
- Mix a little bit of black and white paint together and paint along the stripes of your white pumpkin wheels like in the picture above.
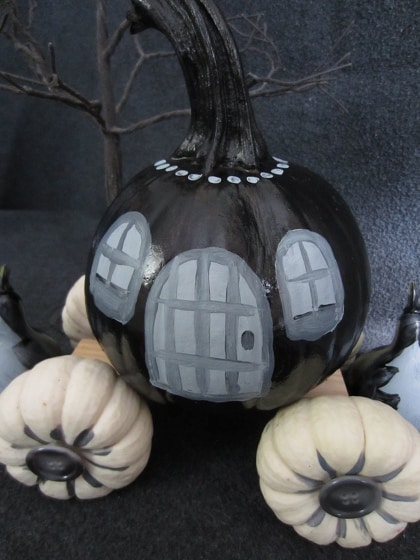
- When your black pumpkin has dried, mix some black and white paint together to paint windows and a door for your coach. I also added polka dots around the top of the coach.
- Use pieces of rolled up scotch tape to attach the buttons to the wheel centers.
- When your pumkpin is completely dry you can pick it up and place it on your coach frame.
Materials needed to make steps going up to the coach:
- 3 wooden books or three wooden rectangles from a craft store (to make stairs). The size needed will vary but you will want something about 1 1/2″ wide. You could also try making stairs out of something recyclable on hand such as matchboxes.
- 1 mini pumpkin
- black paint
- glue
Directions to create the coach steps:
- Glue your 3 small wood books or rectangles together to look like stairs. Here is a close up picture of the stairs so you can see how they stack:
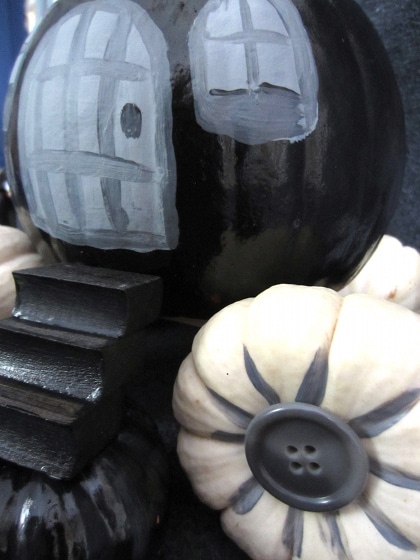
Detail of pumpkin coach stairs and wheels - Allow the glue to dry
- Once the stairs are dry, paint them black.
- Paint your mini pumpkin black as well. My pumpkin needed 2 coats of black paint.
- Once dry, you can place the pumpkin below the coach door and then place the stairs on the pumpkin.
Materials needed to make gourd trees:
- 2 or more “spinning gourds”
- Black paint
- White paint
- Paintbrush
Directions to make gourd trees:
- Paint your pumpkins black and allow to dry. Mine needed 2 coats of black paint.
- Mix white and black paint together to create grey. Then paint tree shapes on the gourds.
- Allow to dry.


Oh my Bonnie. This is fantastic. What creative articles you share. Now if only my grandson lived closer… This article is def. being forwarded this moment to him! Thank you for all these projects that you share and make sound so easy. I really love the step by step with the pictures. Makes me feel like I can do it…. Thank you so much for sharing…Can’t wait for the next months blog…..