How To
Holiday Crafts | Create a Holiday Scene in a Jar
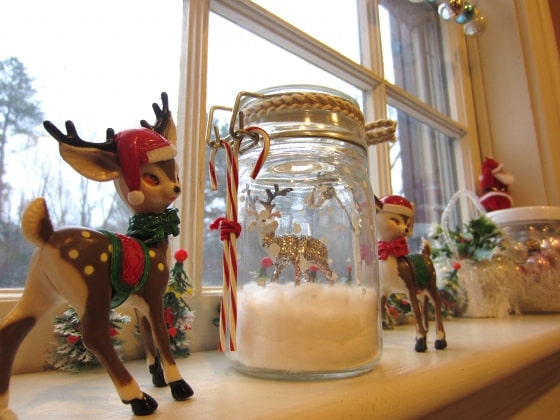
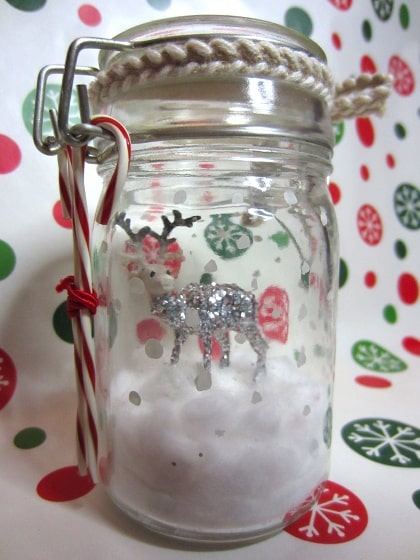
Holiday scenes captured in glass jars are easy to make and can be placed on tabletops, windowsills, and fireplace mantels to add festive charm to your holiday decor. The possibilities for customizing your own jar to fit the theme of the holiday are as endless as your imagination. Rather than going to a craft store […]
Coffee By Design | Portland, Maine
Photo Credit : Katherine Keenan
Materials to Make a Holiday Scene in a Jar:
- 1 smooth glass jar with lid
- 1 plastic deer
- Glitter
- Mod podge
- Hot glue and hot glue gun
- Cotton balls
- White paint
- Small paintbrush
- A wooden block, large bottle cap, or other recycled object for the deer to “stand” on
- Ribbon or twine
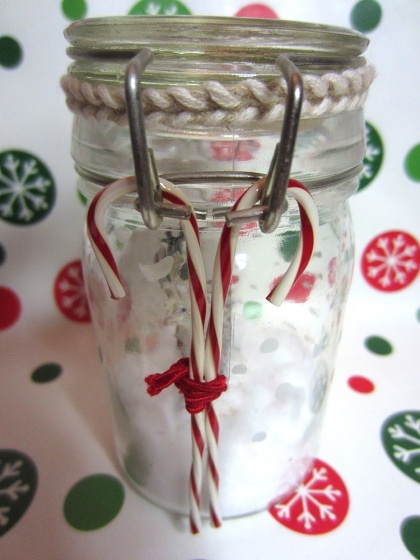
- Embellishments (i.e. I used old plastic candy canes that have been in our ornament box forever. But you could use small bells, decorative buttons, a piece of jewelry such as a pendant or brooch that is no longer worn, etc.)
Directions to Make a Holiday Scene in a Jar:
- Wash and dry the jar thoroughly.
- Use a small paintbrush to dab spots of white paint on the interior of two thirds of the jar–this is to make it look like it is snowing. The non-painted area is where people can look through at the scene in the jar.
- Allow the paint to dry.
- In meantime, clean your paintbrush and then use it to apply a thin layer of Mod Podge onto the deer. Some crafters will prefer to fully coat the deer in glitter, and others will only want the neck down covered. Either way is fine.
- Allow the Mod Podge and glitter to dry on the deer.
- Once the deer is dry, use hot glue to attach the deer to it’s stand (I used a wood block).
- Take several cotton balls and pull the cotton fibers apart a little bit to stretch the cotton out.
- Use hot glue to attach cotton to the sides of the stand and around the deer’s legs.
- Next, put hot glue on the bottom of the wooden block and then lower the deer and block into the jar until it settles on the bottom of the jar.
- For the next step you will need to finish adding cotton around the stand until the deer looks like it is standing on a hill of snow.
- Use the handle part of your small paintbrush to push the cotton into place and shape the “snow” as needed.
- Apply the lid.
- Adorn the lid with ribbons and embellishments. If you apply one central ribbon around the lid then you can attach embellishments around the ribbon by tying them on.
