


How to Carve a Better Jack-o’-Lantern | Tips & Tricks
Professional carver Sean Fitzpatrick shares his best tips and tricks to help you carve the perfect Jack-o’-Lantern this Halloween season.

How to Carve a Better Jack-o’-Lantern | Tips & Tricks
Photo Credit : McCabe, Jarrod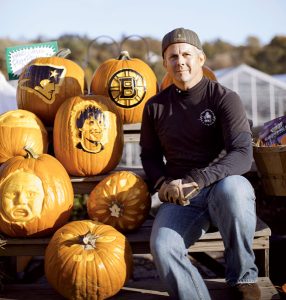
Photo Credit : McCabe, Jarrod
Professional carver Sean Fitzpatrick, owner of Fitzy Snowman Sculpting (fitzysnowman.com), which also specializes in snow, ice, and sand, turns the common pumpkin into high art. Ghostly castle scenes and garish witches are just a few favorites. “There’s nothing better than hearing a kid walk behind me when I’m carving and just go, ‘Wow!'” Fitzpatrick says. “That’s so rewarding.”
Below you’ll find some of Sean’s tips and tricks to help you carve a better pumpkin this Halloween season. We were surprised to learn that one of his top tips involves a medicine cabinet staple. Curious? Read on, then get carving!
How to Carve a Better Jack-o’-Lantern | Tips & Tricks
Pick the Right Pumpkin
The perfect Jack-o’-Lantern begins with a perfectly healthy pumpkin. Inspect your gourd for any mold: The stem, for example, should be free of fuzz and black dots. You also don’t want any soft spots on the skin. “You shouldn’t be able to squeeze it,” Fitzpatrick says. “That means it was picked late or went through a bad growing season.”

Photo Credit : Polly Becker
Have the Right Carving Tools
“Some of the best tools are the simple ones,” Fitzpatrick advises. To clean out a pumpkin’s insides, he often uses an ice-cream scooper, followed by a scouring pad to polish the walls and rid them of any stringlets. A flexible serrated knife–or, even better, a jigsaw–is great for intricate cuts, while a clay-carving loop is terrific for engravings. You can also pick up an inexpensive and versatile carving kit at most craft shops.
Start From the Bottom
“If you cut the top off as your lid, you’ll notice that it dries up first and actually shrinks,” Fitzpatrick notes. Get around that by cutting out the bottom instead; it’ll preserve the gourd’s look and help prevent moisture loss. To take the guesswork out of how the bottom lid goes back on, Fitzpatrick cuts out the shape of a pumpkin, stem included: “That way, you know how it lines up every single time.”
Use Digital Design Templates

Photo Credit : Polly Becker
Existing digital photos–say, of your child’s face–make for fun design templates, Fitzpatrick says. Simply run the image through a photo-editing software program, convert it to black-and-white, and then posterize it to create distinct tonal shades of white, gray, and black. Print out two copies and attach one to the pumpkin, covering it completely with clear packing tape. Next, outline the picture onto the pumpkin with a sharp blade. When you’re done, remove what’s left of the paper, and, with your second image as a reference, start carving. White areas are sections where you’ll cut all the way through the gourd; gray sections will be only partially deep; black areas require just a scraping of the surface.
Use Vaseline to Preserve and Protect
To give his final creations a bit more shelf life and keep the pumpkin from drying out, Fitzpatrick seals the cut edges with Vaseline. “And it helps preserve your design,” he says. After all that hard work, you’ll appreciate that.

Ian Aldrich
Ian Aldrich is the Senior Features Editor at Yankee magazine, where he has worked for more for nearly two decades. As the magazine’s staff feature writer, he writes stories that delve deep into issues facing communities throughout New England. In 2019 he received gold in the reporting category at the annual City-Regional Magazine conference for his story on New England’s opioid crisis. Ian’s work has been recognized by both the Best American Sports and Best American Travel Writing anthologies. He lives with his family in Dublin, New Hampshire.
More by Ian Aldrich