How To
Bohemian Chic Dreamcatchers
Dreamcatchers are a current trend in DIY (Do It Yourself) and design – but instead of their more traditional purpose (to “catch” bad dreams while one is sleeping), they are now more commonly used as home decor. There are multiple ways to decorate dreamcatchers, but in this tutorial I will show you a few tricks for […]
By Bonnie Thomas|Jan 12 2015|![]()
Coffee By Design | Portland, Maine
Photo Credit : Katherine KeenanPhoto Credit : Bonnie Thomas
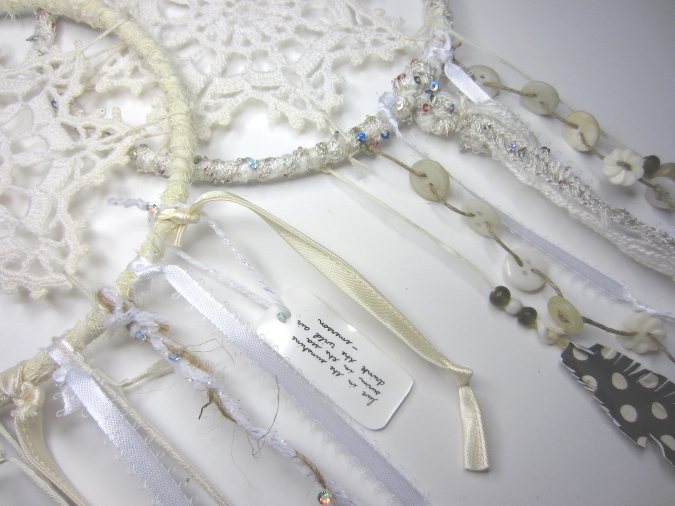
Photo Credit : Bonnie Thomas
Materials for Bohemian Chic Dreamcatchers
- metal crafting hoop
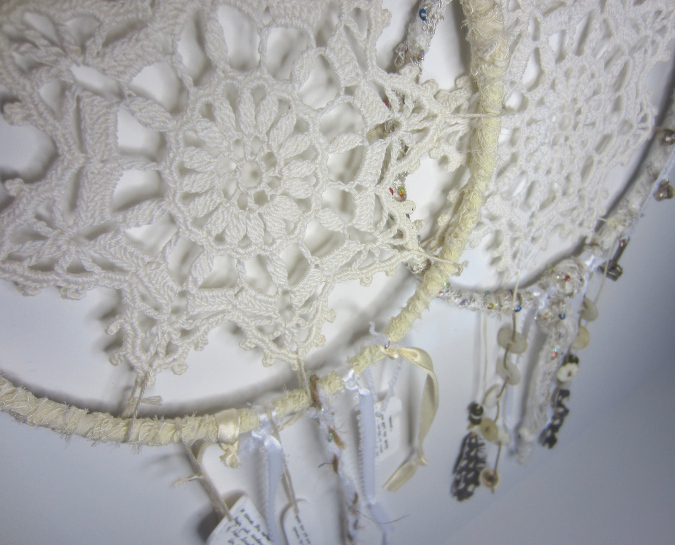
- crocheted doily that fits inside the hoop
- off-white or white embroidery string
- various white and off white ribbons – choose a variety of textures and style if you’re able – i.e. lace, satin, plain
- white and/or off white yarns
- brown twine
- scissors
- beads, feathers, charms, and buttons of your choice (optional)
- Shrinky Dinks Shrinkable Plastic – “Rough and Ready” style (optional)
- Paper hole punch (optional)
- Black permanent marker (optional)
Directions to Make Bohemian Chic Dreamcatchers
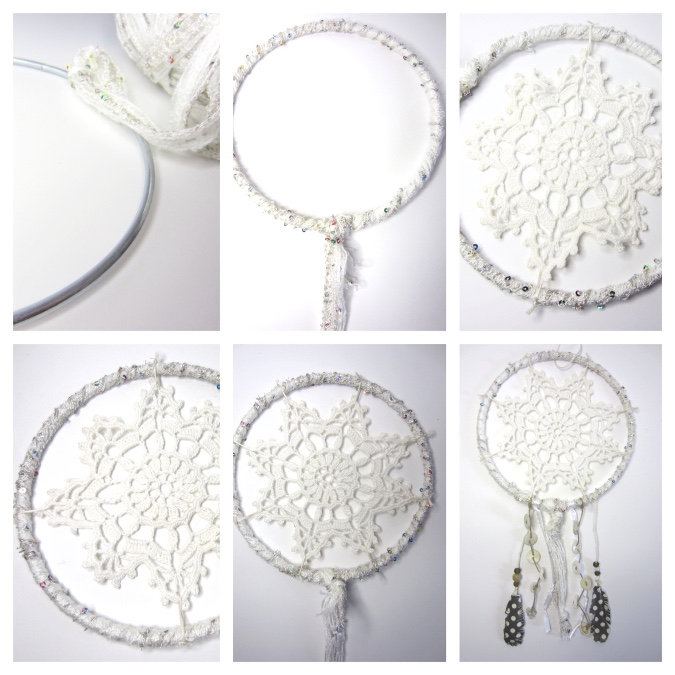
- Choose a style of ribbon, string, or twine to wrap around your metal crafting hoop. I chose a style of yarn that has some lace and sequins.
- Tie one end of the yarn onto the hoop. Do not trim the excess yarn from the knot because you will need it later.
- Wrap the yarn around the frame of the hoop – wind the yarn in and around the hoop until the frame is entirely covered.
- When you get back to the start, tie your yarn where you made your original knot (use the excess yarn from the original knot to tie off the yarn).
- If you like, you can make the central piece of yarn to hang from your dreamcatcher by trimming several inches below the knot (see photo). This is completely optional.
- Place your doily in the center of the metal hoop, on a flat surface.
- Use the embroidery thread to tie one “point” of the doily to the hoop. If the doily doesn’t have obvious points, choose equidistant areas to attach.
- Repeat the above step, attaching another section of doily on the opposite side of the previous knot. This will help to keep your doily in the center of the dreamcatcher.
- Choose another point to tie to the metal hoop, and then tie its opposite point as well.
- Continue tying the doily points to the hoop in this pattern until the doily is fully secured to the hoop.
- Trim any excess yarn from your knots.
- Tie ribbons, yarn, or twine to the bottom center of the dreamcatcher. You can also braid any of these items together if you want to add some extra detail.
Steps to making Bohemian Chic Dreamcatchers
Photo Credit : Bonnie Thomas - Option 1: Tie a string of vintage buttons to your dreamcatcher.
- Option 2: Add a string of beads to your dreamcatcher and/or attach beads to the ends of any of your ribbons/string/yarn.
A variety of ribbon, twine, and yarn added to a dreamcatcher
Photo Credit : Bonnie Thomas - Option 3: You can tie feathers onto your ribbons/string/yarn as well. If you need a tutorial for making the paper feathers seen in these photos, go to https://newengland.com/craft-ideas/simple-paper-feathers to check out the tutorial for making Simple Paper Feathers.
- Option 4: Attach charms to the bottom of any of the ribbons/string yarn.
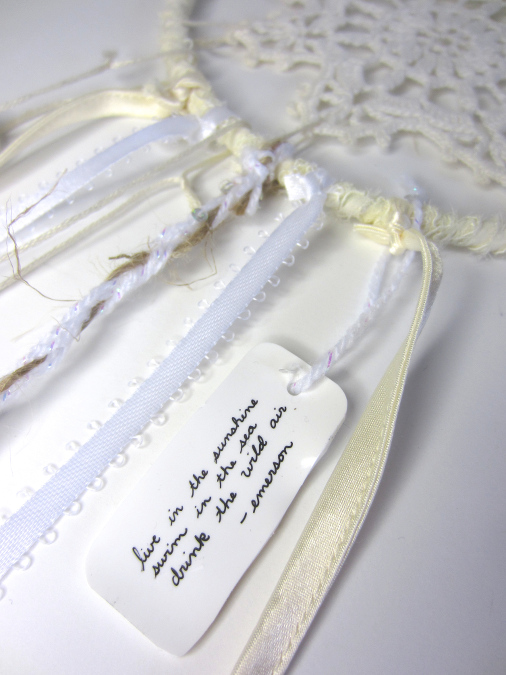
- Option 5: Make your own charms and add-ons using Shrinky Dinks shrinkable plastic (Rough and Ready style will work best). Follow the directions on the packaging to make your own add-ons. I cut out various squares and rectangles and wrote my favorite quotes using permanent black marker. I also decorated words (i.e. “dream” and “fly”) and drew symbols like feathers and arrows. Before putting these in the oven to bake, I used a punch to make a hole in the add-ons so that I could tie them onto my dreamcatchers.
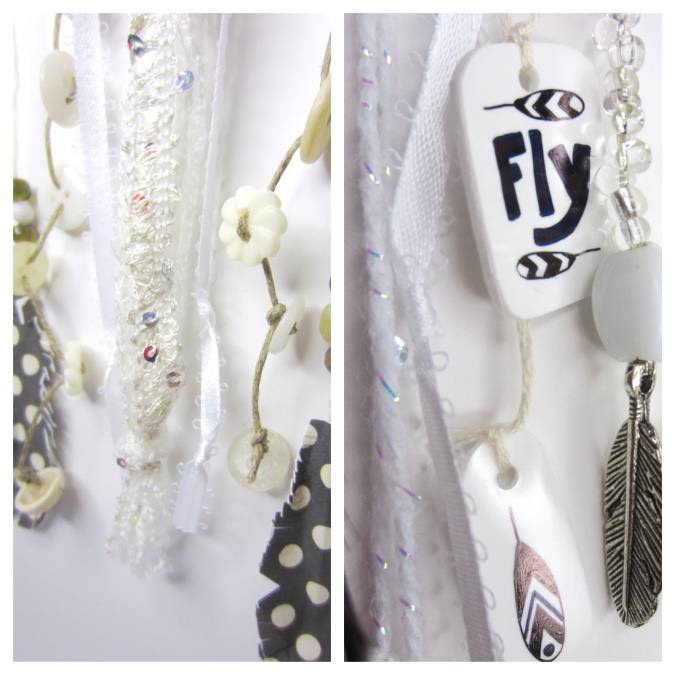
Dreamcatcher “add-ons”
Photo Credit : Bonnie Thomas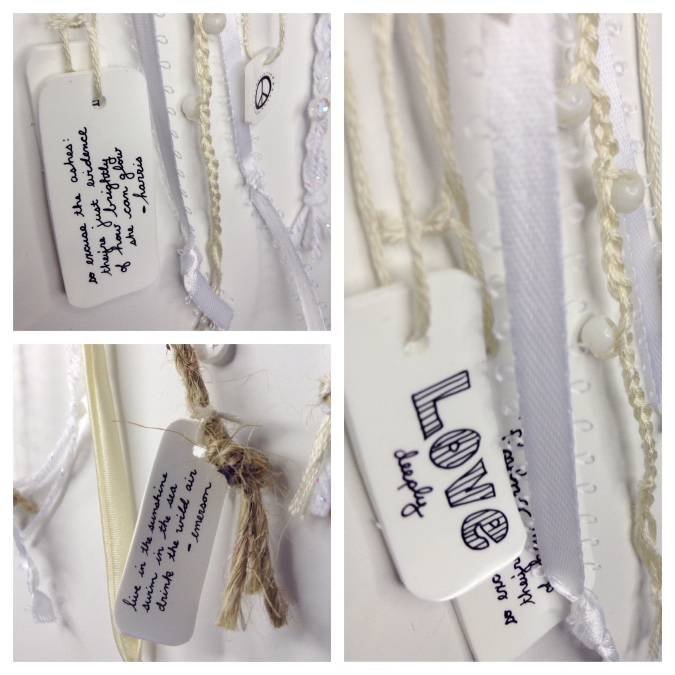
Dreamcatcher “add-ons”
Photo Credit : Bonnie Thomas